BF6 Best Weapons Tier List (Season 1 Meta Shift + Full Spreadsheet)
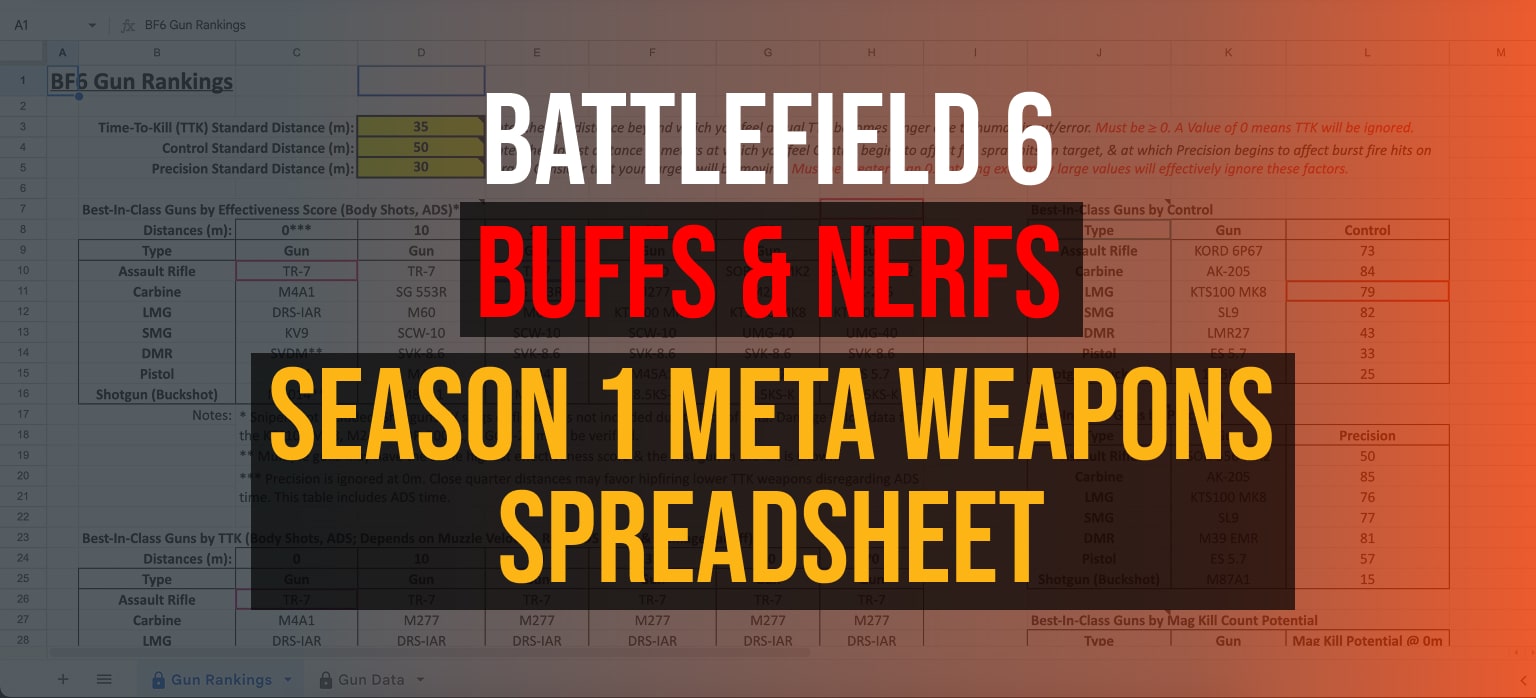
This breakdown is based on the community spreadsheet compiled by Reddit user u/Pavlovs_Mutt, who meticulously tested each weapon after the Season 1 patch.
With the introduction of new spread mechanics, accuracy now rewards disciplined bursts and punishes reckless full-auto fire. Faster-firing guns see more deviation per shot, while precision and slower weapons finally get their time to shine.
Below is the full breakdown of every class tier, followed by the major winners, losers, and new meta loadouts.
You can view the full data here: Season 1 BF6 Weapon Spreadsheet.
Overview — What Changed This Season
- Spread Mechanics Overhaul: Sustained fire builds spread faster, especially at long range. The first few rounds stay laser-accurate, making opening shots critical.
- Slower Fire Rate Weapons Buffed – Weapons like the B36A4 and L85A3 now reward controlled fire with pinpoint precision.
- Carbines and SMGs Reined In – Still dominant in close-quarters, but long-range “beaming” is gone.
- Consistency Over Chaos – Battlefield 6 now rewards burst control, not spray-and-pray.
Assault Rifle Tier List
| Tier | Weapons | Notes (Buffs / Nerfs) |
|---|---|---|
| S | TR-7 (Lowest TTK Build), SOR-556 MK2 (Best Loadout), SKORD 6P67 | TR-7 posts the fastest TTK across every tested distance; the new spread logic favors its balanced velocity + damage curve. SOR-556 maintains elite precision and all-range control. |
| A | L85A3, NVO-228E ⬆ | Both excel in burst fire; the L85A3 remains smooth under recoil while NVO-228E gains ADS stability. |
| B | B-36A4 (Best Loadout) | Heavy-barrel setups deliver solid mid-range accuracy but slower kills than TR-7. |
| C | CM433, AK4D, DTR-7 | Require disciplined bursts—high spread growth beyond 35 m. |
Takeaway:
TR7, KORD and SOR-556 dominate Season 1 as the all-rounders, while the L85A3 makes a surprise comeback for burst-focused players.
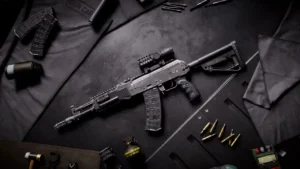
Light Machine Gun (LMG) Tier List
| Tier | Weapons | Notes (Buffs / Nerfs) |
|---|---|---|
| S | DRS-IAR (Best Loadout), M250 (Best Loadout) | Dominates every distance tested. Its slower ROF syncs perfectly with new spread mechanics for zero-drift lane control. |
| A | KTS100 MK8 | Still powerful, but slightly slower TTK than DRS-IAR and M250. Excellent sustained accuracy. |
| B | AL110, M240L | Reliable mid-range performers, aided by recoil smoothing. |
| C | DM60, RPK-M | Struggle with rapid spread growth; outclassed by the DRS-IAR. |
Takeaway:
The DRS-IAR is this season’s statistical monster—best-in-class TTK from 0 to 70 m. The M250 and KTS100 MK8 are lane-holding kings, benefiting from the slower, heavier fire rhythm.
Submachine Gun (SMG) Tier List
| Tier | Weapons | Notes (Buffs / Nerfs) |
|---|---|---|
| S | SGX (Best Loadout), KV9, SCW-10 | KV9 tops the TTK chart at 0–10 m and reclaims dominance beyond 35 m thanks to manageable recoil. SCW-10 excels in burst engagements at mid-range. |
| A | SL9, UMG-40 | Stable, slower-ROF SMGs that reward accuracy inside 30 m. |
| B | BPW7A2, CPW5A3 | Balanced handling but limited reach. |
| C | MP5, MP7, USG-90, AV9 | Hit hardest by spread increase after 10 shots—CQC only. |
Takeaway:
KV9 is the clear winner statistically. SCW-10 edges out others at medium distances for players with tighter control. The slower-firing SL9 and UMG-40 retain stability in sustained fights.
Carbine Tier List
| Tier | Weapons | Notes (Buffs / Nerfs) |
|---|---|---|
| S | M277 | Outperforms all other carbines from 10 to 70 m; superior TTK curve and controllable recoil. |
| A | M4A1 (Best Loadout), SOR-300SC | M4A1 still shines up to 20 m but drops off fast. SOR-300SC offers precision at range when burst-fired. |
| B | AK-205, ASG 553R | Solid but overshadowed by M277’s raw efficiency. |
| C | CQBZ-192, GRT-BC | Niche picks for bipod setups—less effective past 40 m. |
Takeaway:
M277 is the carbine to beat, providing full-auto stability and top-tier TTK at nearly all ranges.
DMR Tier List
| Tier | Weapons | Notes (Buffs / Nerfs) |
|---|---|---|
| S | LMR-27 (Best Loadout) | Dominates 20 m + engagements with tight grouping and minimal deviation. |
| A | SVD-M, M39 EMR ⬆ | SVD-M offers two-tap potential; M39 EMR gains better precision. |
| B | DSVK 8.6 | Lower accuracy and slower rhythm hurt viability. |
Takeaway:
LMR-27 is the new precision pick. Players who prefer deliberate engagements will thrive.
Pistol Tier List
| Tier | Weapon | Notes |
|---|---|---|
| S | M44 | Highest burst damage and consistent accuracy. |
| A | M45A1, ES 5.7 ⬆ | M45A1 is a reliable all-rounder; ES 5.7 gains standout control and precision. |
| B | P18 | Quick-draw speed but average stability. |
| D | GGH-22 | Weak stopping power. |
Buffed vs. Nerfed Highlights
Buffed / Improved
- M433 — tighter full-auto spread
- B36A4 — improved heavy-barrel accuracy
- KORD 6P67 — smoother spray transitions
- NVO-228E ⬆ — more stable ADS performance
- L85A3 — enhanced recoil control
- QBZ-192 — bipod mitigates spread at range
- M39 EMR ⬆ — higher precision retention
- ES 5.7 ⬆ — better recoil recovery and grouping
Nerfed / Toned Down
- M4A1 — effective only ≤ 40 m
- M277 / M417 — higher spread buildup
- AK-205 — weaker past 25 m
- MP5 / MP7 / SCW-10 / USG-90 / AV9 — heavier deviation after initial burst
Recommended Meta Loadouts
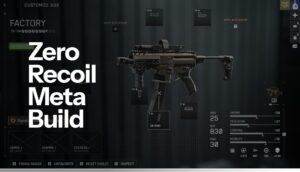
KORD 6P67 (Assault Rifle Meta Pick)
- Muzzle: LONG SUPPRESSOR
- Barrel: 415MM PROTOTYPE
- Underbarrel: CLASSIC VERTICAL
- Mag: 36 RND
- Why: Exceptional first-shot accuracy and spread control.
DRS-IAR (Precision Anchor)
- Muzzle: LIGHTENED SUPPRESSOR
- Barrel: 20″ SDM-R
- Underbarrel: CLASSIC VERTICAL
- Mag: 36 RND
- Why: High accuracy even without perfect attachments.
UMG-40 (SMG Meta Choice)
- Muzzle: STANDARD SUPPRESSOR
- Barrel: 305MM CUSTOM
- Underbarrel: SLIM ANGLED
- Ammunition: SYNTHETIC TIP
- Why: Stability under the new spread system and powerful short-range time-to-kill.
SL9 (Close-Range SMG Beamer)
- Muzzle: STANDARD SUPPRESSOR
- Magazine: 60RND MAGAZINE
- Barrel: 9″ FACTORY
- Why: Wins duels if you land your first 8–10 rounds; reset your spray afterward.
LMR-27 (DMR Meta)
- Muzzle: LINEAR COMP
- Barrel: 24″ EXTENDED
- Underbarrel: LOW-PROFILE STUBBY
- Optic: ST PRISIM 5.00X
- Why: Perfect burst rhythm for the Season 1 spread profile.
M250 (LMG Meta Anchor)
- Muzzle: LONG SUPPRESSOR
- Barrel: 556MM PROTOTYPE
- Underbarrel: LOW-PROFILE STUBBY
- Mag: 50RND BELT POUCH
- Why: Slower fire rate + heavier build thrive under new accuracy tuning.
Pro Tips
- Prioritize Control Attachments – Compensated Brake + Vertical Grip setups outperform recoil-reduction combos now.
- Bursting Is Back – Think Battlefield 4—fire in 4- to 6-round bursts for maximum accuracy.
- Heavier Barrels Win Fights – They drastically reduce spread growth.
- Avoid Full-Auto Past 40 m – Especially with SMGs and Carbines.
Related Posts
A Guide to the Best Battlefield 6 Weapons & Loadouts
Battlefield 6 Top 5 Best Guns for Maximum Kills